

May 1, 2017
When Ultimaker released its Ultimaker 3 in October last year, the company described it as a “next-generation professional 3D printer.” Ultimaker has a good reputation among the Maker crowd, so we were eager to see if the Ultimaker 3 would stand up to the demands of professional design engineers.
The Ultimaker 3 is offered with a 8.5x8.5x7.9-in. build volume. For those who need bigger prints, the company also offers the taller Ultimaker 3 Extended, which provides an extra 3.94 in. (100 mm) of building space. We reviewed the Ultimaker 3, which features dual extrusion for 3D printing with two different materials or materials of different colors; smart material detection via near-field communication (NFC) technology; active bed leveling; integrated Wi-Fi capabilities in addition to USB and Ethernet connections; and a built-in camera for remote monitoring of print output. Other than the dimensions, the two printers have the same specifications.
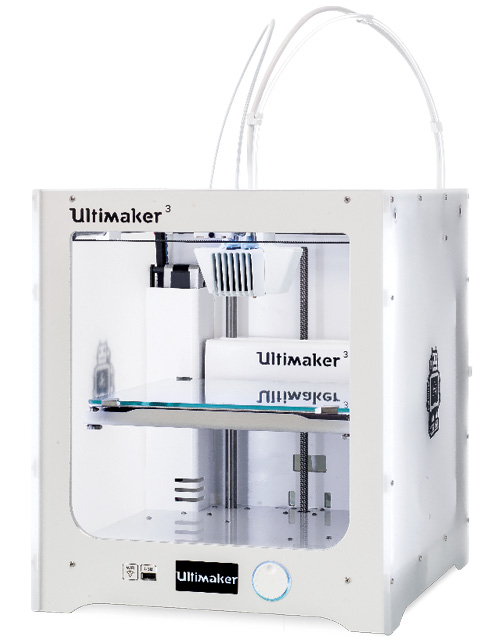
 The Ultimaker 3 is capable of great quality 3D prints, but that quality can take a long time to print. Image courtesy of Ultimaker.
Unbox and Print
Unlike some early 3D printers aimed at hobbyists, the Ultimaker 3 is shipped fully assembled with everything you need to begin 3D printing, including a power supply and cable, spool holder, glass plate, two 350-gram spools of filament (PLA and PVA), USB and Ethernet cables, two swappable 0.4 AA (general purpose) print cores and a swappable 0.4 BB (intended for PVA support material) print core. The company even throws in an empty USB stick, a glue stick, grease, hex wrenches, a test print, and a calibration card and XY calibration sheet. “Throws in” is a poor choice of words. The components are carefully packaged in a way that reminded us of unboxing an Apple product. In addition to the hardware, its Cura 3D (version 2.3) print preparation software and Ultimaker app for iOS and Android are free to download.
The white 3D printer would be at home in any modern office. It has frosted glass sides that allow the glow from the printer’s light (a necessity for the onboard camera) to shine through for a suitably futuristic aesthetic. With a footprint of less than 14x20 in., it takes up less space than many inkjet printers.
Following the included quick-start guide, we removed some bubble wrap and tape, attached the spool holder to the back, slid the glass build plate into place, plugged the power cord into a standard 120-volt outlet and hit the power button. After a few seconds the Ultimaker 3’s onscreen display lit up with the company’s logo and walked us through snapping in the print cores, loading the filament and connecting the printer to our Wi-Fi network. Because the Ultimaker filament contains NFC tags, the printer was able to automatically detect when we loaded the PVA and PLA materials. Once connected to Wi-Fi, we updated the printer’s firmware and were ready to print. All totalled, unboxing through initial setup took less than an hour and was accomplished via a scroll wheel and the printer’s on-screen menus.
We found the scroll wheel to be touchy, sometimes making it difficult to select the option we wanted on the first try. At times, after accidentally clicking an incorrect menu item, we wished there were a “back” or “cancel” option on the screen. Sometimes this option existed, but other times it did not. Once we installed the app and Cura software, we found the click wheel to be a handy secondary interface at times, but was not our first choice.
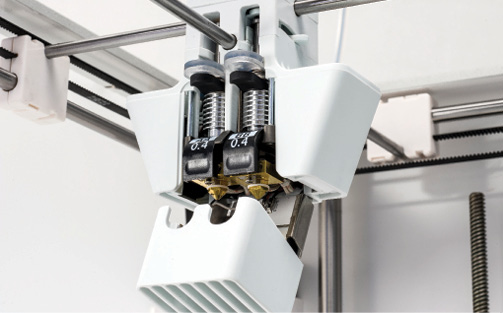 Dual Extrusion print cores in the Ultimaker 3 are easy to quickly swap for different material combinations. Image courtesy of Ultimaker.
Print Speed and Quality
Without bothering to calibrate the 3D printer, we started melting plastic. We threw job after job at it—multiple small models in the same build, large models, fast drafts and high quality prints—intending to test the 24/7 type of use the printer might see in a small design engineering shop. The 3D printer’s self-leveling bed can only be fully appreciated if you’ve used a 3D printer without one. Before a print, the Ultimaker 3 quickly checked level by touching the hot end to the bed, adjusting itself as needed and then cleared the nozzle. Soon it was humming along on a print, emitting less noise than our inkjet printer.
For the most part, we accepted the Cura 3D slicing software’s recommended settings based on the printer, model, material and output quality layer heights (draft 0.2mm; fast 0.15mm; normal 0.1mm and high 0.06mm); chose an infill percentage and whether we wanted supports. More fine control of various aspects of the 3D printer are available (fan speed adjustments, hot-end and bed temperatures, infill types, Z-hop adjustments and many more), but are behind a clean interface that is welcoming to beginners. Of course, the printer can be used with other 3D printing software as well.
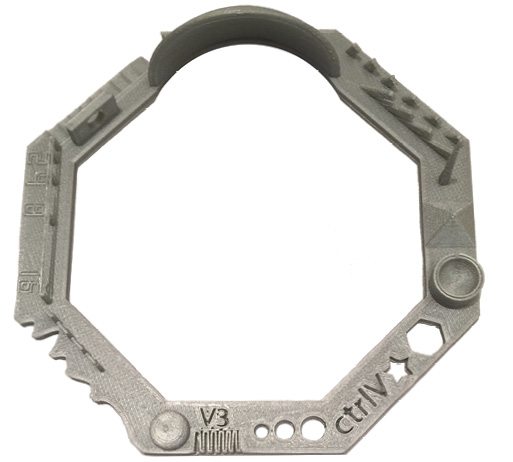 This test Model took 4 hours and 3 minutes to print at high quality without supports. It measures 3.94x3.94x0.93 in. Model courtesy of ctrlV.
We were quickly able to test the printer’s 24/7 operation because a model roughly 5x5x4 in. at a high quality 0.06mm layer height without supports took 29 hours to complete. With PVA supports suggested by Cura, that same model would have taken more than three and a half days to print. The good news, the 0.06 mm resolution looked great (the normal 0.1mm layer height would be acceptable for many prototypes) and the printer had no hiccups printing day and night. We could check the progress via the built-in camera’s video feed over our phone or the Cura desktop software. The bad news, as with any 3D printer, you will be balancing time vs. resolution and tweaking default settings to get the support and quality you need in an acceptable time frame.
After days of near continuous use, we used up the included Ultimaker PLA material. We also tested non-Ultimaker PLA and ABS materials with the Ultimaker 3. This meant we had to manually select the type of material, rather than the printer gathering that info via NFC. It took just a few seconds to do so, making it difficult to recommend the higher cost ($49.95 for 750g of PLA) of Ultimaker’s smart spools. The off-brand PLA filament ($15 for 1kg of PLA) worked perfectly, but we had some trouble getting the off-brand ABS to adhere to the print bed. Though admittedly, we didn’t try workarounds like taping off the build plate or tweaking its temperature. All told, we went through more than 3 lbs. of material, running the 3D printer with very few breaks. Other than the non-Ultimaker ABS adhesion issue, the only failed prints happened when the 3D printer ran out of material.
Value and Verdict
For professional design engineers who need to spend more time creating innovative products and less time tweaking 3D printer settings to get a good prototype, the $3,495 Ultimaker 3 offers push-button 3D printing conveniences. Some, such as its dual extrusion and self-leveling capabilities, offer more value than others, such as the NFC material identification. For design engineers who want to invest the time to learn to be as efficient as possible with their 3D prints, Ultimaker offers a plethora of self-help guides, videos and active user forums. The Ultimaker 3 is a good example of the evolution of desktop 3D printers into something easy enough for a first-timer to use without reading a manual, but powerful enough for many professional prototyping applications.
More Info
Subscribe to our FREE magazine, FREE email newsletters or both!
About the Author
Jamie Gooch is the former editorial director of Digital Engineering.
Follow DE

