Latest News
May 18, 2010
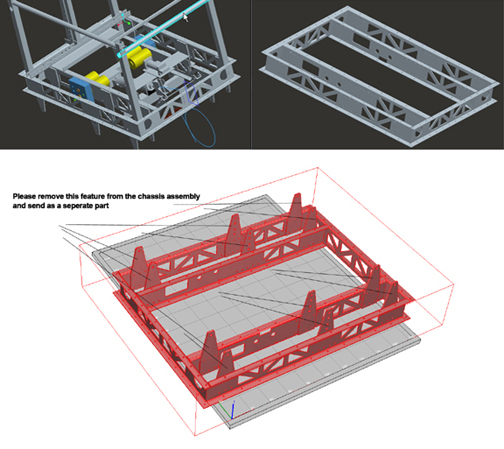
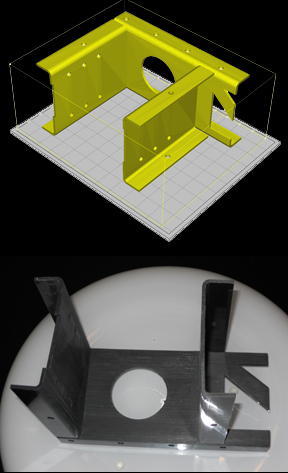
Near the end of March, FIRST Robotic Team 2220‘s CAD mentor Ed Anderson received a FedEx package at his home in Eagan, Minnesota. Inside, he found a small cross-section of the team’s robot, printed in 3D, courtesy of 3D printer developer Solido. It was the team’s first encounter with 3D printing technology, a learning experience that taught them how to transform their Pro/ENGINEER digital model into a tangible fragment of the robot’s chassis.
In his email exchanges with Solido, Anderson inquired, “We don’t really know much about 3D printing: Can you fabricate moving pieces, or just static models? Is the setup different for static and dynamic models? Also, we didn’t model the nuts bolts, and screws that hold the pieces together—just mated them in the assembly. Will that cause any problems?”
Ran Houminer, a product manager at Solido, explained that each part of the assembly should be printed separately, to be assembled after printing. That’s the recommended method with Solido’s technology (Solido uses the SD300 machine to print the team’s robot), but there may be other 3D printers that can print an assembly in its entirety, then let you divide it into individual parts by removing support materials. Standard parts that can be purchased off the shelf—such as brackets, screws, and bolts—should be excluded from the model.
The first step was to export a .STL file of the part of the robot the team wanted to print—in this case, the chassis. Ed Anderson and Alex Anderson (his son, also part of Team 2220) managed to save the Pro/E model into STL, using the default settings. But they discovered the chassis was too big for the SD300’s build chamber, measuring roughly 6 x 8 x 5 inches. If the model was scaled to a smaller size, then the walls would be too thin to construct.
In the end, Ed and Alex decided to print instead a latch piece (which could fit int the machine’s build chamber) and a chopped portion of the chassis. Upon receiving the printed pieces, Ed wrote, “I wanted to take this opportunity to thank you [Solido] myself for everything. I’m very impressed with the printed latch, as well as the other samples you included.”
For more on Team 2220, nicknamed Blue Twilight, read the following blog posts:
- Introducing Blue Twilight: Team 2220
- Twilight Robotic Adventures: Kick Off!
- Twilight Robotic Adventures: Grab, Toss, and Dangle
- Team 2220 Rounds Out the Season with Chrysler Team Spirit Award

Subscribe to our FREE magazine, FREE email newsletters or both!
Latest News
About the Author
Kenneth Wong is Digital Engineering’s resident blogger and senior editor. Email him at [email protected] or share your thoughts on this article at digitaleng.news/facebook.
Follow DE
